
After months of dreaming about it, you’ve finally decided to take the plunge and build your own online course. There’s just one problem - you aren’t really sure how to create an online course.
You’re in luck, because we’ve developed this in-depth guide that will show you exactly how to create your online course.
This guide will provide you with a step-by-step overview of what’s involved in developing an online course, as well as useful resources to help you explore these steps in greater detail. Plus, a deep dive into how AI will change the landscape of online courses.
After reading this guide, you’ll have a clear sense of what’s involved in creating an online course, the different steps you’ll need to take, and how to get started.
Ready to discover how to create an amazing online course?
Let’s dive right in!
How to Create an Online Course: A 10-Step Guide
Just how do you create a successful, highly impactful online course that stands out from all the rest?
Here at Mirasee, we’ve helped thousands of course creators from many different industries plan, build, and sell profitable courses.
And over the years, we’ve honed the following step-by-step process for building highly impactful online courses.

Choose Your Profitable Course Topic
A successful online course begins with choosing the right topic. It’s crucial to pick a topic that benefits both you and your audience. This means the topic needs to be in a profitable niche, it needs to be in demand, and it also has to address your audience’s specific needs and pain points.
So, how do you find a topic that benefits both you and your students? A good starting point is to ask yourself these questions:
- What is my niche or area of expertise?
- What topics am I passionate about?
- How have I previously helped people?
- Who is my ideal customer, and what is their biggest problem?
- What causes them pain?
- What is the solution they need?
- What background knowledge do they need to use the solution?
- How can I provide this solution?
Answering these questions will help you brainstorm some possible course topics. Jot your ideas down and try to narrow down your list to a few topics.
Once you’ve identified your profitable topic (or several topics), it’s time to do some research.
There are three main questions to consider when researching your course topic.
1. Is there a demand for your course?
Is your course something people actually want? You can find the answer by conducting research to see whether people are already talking about your topic. So where do you start?
One of the easiest places to start is Google. A Google search can show you the top questions people are asking about your topic. If there are several pages of results, you know there is interest in that subject. Be sure to look beyond the first page to see what other content may be tangential to your course topic. Also, be sure to check out the search volume for your course topic, which you can do with a tool like Google Trends. If you discover that many people are searching for your chosen topic and that courses on this topic already exist, it’s a good sign that there’s demand for your course.
Next, check social media groups and online forums. Facebook and LinkedIn are two platforms that have groups you can join. By joining these groups, you can read the discussions that are posted and use that information to flesh out your online course idea. You can also look for online forums like Reddit threads to find long discussions as well. As a general rule, it is best not to publicly advertise your products within these groups and forums as they typically have a strict non-promotion rule.
If you have a budget for your market research, you can also invest in the courses of your competitors. When you purchase competitor courses, you can see from the perspective of your target audience. You can explore opportunities to create a smoother customer experience for your target audience while assessing the demand for your niche.
In addition to online research, it’s also a good idea to interview a few people who are part of your target audience to gauge their interest in your topic. You can find potential interviewees on social media and online forums.
2. Who is your ideal customer?
Having an in-depth understanding of your ideal customer is crucial for the success of your online course.
There are two main factors to consider when you are researching your ideal customer: demographics and psychographics.
Demographics are the physical traits of your ideal customer. They look at metrics such as:
- Age
- Gender
- Income Status
- Education Status
- Geographical Location
- Social and Political Affiliations
Psychographics represent psychological traits. They include things like:
- Personal goals and ambitions
- Fears and frustrations
- Values they align with
- Traits that they dislike
When you gather all of this data, you will start to see the persona of a potential customer. You will know how to communicate with them and what will motivate them to purchase your online course.
If you don’t have a clear image of your ideal customer just yet, an extremely useful exercise is to craft a customer profile. We’ve written a separate guide that walks you through the process of creating your customer profile, and we strongly encourage you to create one before moving on to the next phase of your research.
3. What problem will you solve?
You also need to be totally clear on what problem your course will solve. Something that great courses have in common is they go deep into solving one big problem your audience has. Before you create your course, you need to understand what this problem is clearly. This is another reason why creating a customer profile is important - you need to know who they are to uncover what their biggest problem is.
So, how do you know if you are solving a big enough problem? Or if your problem is specific enough? Start by examining your ideal customer’s journey.
For example, let’s say you are creating an online course about learning to draw. Learning to draw is in huge demand, but it is also a broad niche. You can draw with a variety of tools and mediums. Students might have varying skill levels and interests. A complete beginner might only know how to draw stick figures, while an amateur might struggle with form and composition.
If you narrow your focus, you will see a variety of possibilities for your online course. You could target complete beginners with a “drawing 101 course.” Or perhaps you might focus on a specific artistic style like cartoon drawing or charcoal drawing.
Once you choose your topic and conduct the necessary research to ensure it’s profitable, you can validate your course idea.
Validate Your Course Idea
Before you continue investing more time and money into your course, you need to make sure people will actually buy it.
To gain this knowledge, you’ll need to validate your course idea. One highly effective way to test out your course idea is to use a landing page builder to create a sales page for your future online course.
On this sales page, you’ll need to make it clear who your course is for, what problems it will help them solve, and what kind of transformation they will achieve by taking it. You’ll also need to include a compelling call to action that encourages prospects to pre-order your course, leave a deposit, or sign up for a waiting list.
When validating your idea, it’s crucial that you track and analyze your data. Some of the metrics you’ll want to track include the number of visits to your sales page, your conversion rate, the number of email opens, and the number of link clicks.
You’ll also want to consider the following questions when validating your idea:
- What does success look like?
- How much money do I need to make to validate my course idea?
- How many people do I want to commit to this course before I do?
Once you’ve completed the validation process and answered these questions, you should have a clear sense of whether the course idea is a viable one. If so, you can move on to the next step.
On the other hand, if your course idea generates little interest, you’ll want to go back to the beginning and brainstorm some different ideas. This might feel discouraging but don’t give up. Remember that it’s far better to learn this now instead of putting much time and effort into a course people won’t buy.
Plan and Outline Your Course
In this step, you begin to structure your course by figuring out the topic of each lesson and creating a high-level outline of your course. Although outlining might seem tedious, it’s a crucial step in planning your course and can actually make the course creation process move much faster.
So, how do you begin to outline your course?
A good place to start is by brainstorming as many lesson ideas as you can and jotting them down. Once you have a list of ideas, start thinking about how long your course will be and which lessons should come at the beginning, middle, and end. From there, fill in any gaps on your list of ideas to create a framework for your course.
Next, take a look at how your lessons will be delivered. There are many formats that you can use to present your course materials, including but not limited to the following:
- Videos
- Photos
- Diagrams, graphs, and visual representations
- Apps and Programs
- Books, ebooks, and PDFs
- Worksheets and Homework
- Presentation Slides
- Podcasts
- Blog articles
- Worksheets
- Supplemental reading materials
- Quizzes
After you have a basic framework for your course, write a few learning goals and objectives for each lesson. If you’re wondering what the difference is between these, here’s a quick overview.
- A learning goal is a general statement of what you want your students to learn in your course or lesson.
- A learning objective or outcome is a brief statement that describes what the students will be able to achieve by the end of the lesson, using clear and measurable language.
Once you’ve clarified your learning goals and objectives, you can then create a bulleted list of points you want to make and questions to address in each lesson.
When you’re done, you’ll have a clear high-level overview of your course, what each lesson will cover, and what order would best suit the needs of your students.

Create Your Course Content
After all that preparation, it’s finally time to create your content! Before you start writing your scripts and recording your videos, you need to clarify a couple of things.
- What type of content you’ll create (video, audio, slide decks)
- Where you’ll get your material from (past experience, stories, third-party research)
- What your production schedule will be
The idea of creating all this content might seem daunting, but the good news is you don’t necessarily need to start from scratch. There’s probably a good chance you already have some material based on work you’ve previously done.
If this is the case, we recommend you audit all your existing articles, videos, workshops, processes, copy, and anything else you can repurpose into course content. Make a list of all the content you already have related to your course topic and consider how you can work it into each lesson. Also, consider how well each piece of content is performing, based on the number of views, click-through rates, downloads, and any other metrics you want to review.
After determining your best-performing pieces of content, brainstorm ways you can incorporate them into your course modules.
Doing this should make it far easier to decide on the type of content you would like to create. After you’re clear on the type of content you’ll be developing, you can go ahead and start scripting the materials you’ll need for your course.
Depending on your course, these materials may include:
- Homework assignments for your students
- A descriptive tagline for your course
- A description of your course, including the transformation you promise
- Module titles, lesson names, and a 2- to 3-line description of each lesson
- A script for an intro video that previews what your course is about
- The slides for your course
- A script for each lesson
A good rule of thumb to follow is to keep each lesson focused on 1 to 2 main ideas. That way, your students will be able to master concepts one at a time and not feel overwhelmed.
Creating all your course materials may seem daunting at first, so ensure you have all the tools you need to set your course up for success. Here are a few possible tools to consider:
- AI Writing Tools: To help you research and generate your drafts faster
- Video Editing Tools: To polish your recordings
- Grammar Checkers: To find any grammatical errors and typos
- Content Creation Tools: Everything from screen recorders to word processors to design tools
- SEO Tools: For keyword research, especially for blog posts
After all your materials are complete, you’re ready to start filming your course content!
Before you get on camera, you’ll need to clarify what equipment you’ll need based on the type of video you’re creating. For example, if you’re going to appear in a talking-head type video, you’ll need a quality camera and microphone, adequate lighting, and possibly a green screen.
On the other hand, if your videos are screen recordings, the process will look very different. You can learn more about how to create screen recordings here.
You’ll also need some kind of software to edit your videos. Video editing software takes a considerable amount of time and effort to master, so you might consider outsourcing this part to a professional video editor.
Once your content is created and your videos are ready, it’s time to bring your course online.
Bring Your Course Online
Before you can upload your course, you need to choose your course hosting platform, which is what you’ll use to build, host, and publish your course.
There are countless course platforms and learning management systems (LMS) you can choose from, and it might seem challenging to know where to start. To simplify this process, we’ve broken down the different types of course hosting options into four main categories.
Standalone Course Platforms
A standalone online course platform allows you to create and host your own online course or school. They typically provide all the tools you need to build and sell your online course. Some popular standalone course platforms include Thinkific, LearnWorlds, Teachable and Ruzuku.
Ruzuku stands out among standalone platforms for its focus on learning design — built-in discussion at every lesson, step-by-step course structure, and support for live cohort-based courses alongside on-demand content.
All-in-One Online Course Platforms
All-in-one course platforms provide you with all the tools you need to develop and sell online courses and manage your online course business. These include web content management tools, as well as marketing, sales, and customer service tools. Some of the most popular all-in-one course platforms on the market are Kajabi, Kartra, and Podia.
WordPress Online Course Plugins
Next up, we have online course plugins that you install on your existing WordPress site. These plugins are ideal for course creators who want to host their course on their own WordPress site and have complete control over their course. There are dozens of WordPress plugins available, including LearnDash, Access Ally, and Course Cats.
Online Course Marketplaces
The last category of course hosting options are online course marketplaces like Udemy and Skillshare. These online course platforms are web-based and allow you to build your course and promote it to an established audience. These types of course platforms provide everything you need to build your course, and many offer drag-and-drop features for easy course creation.
To get started, we recommend you decide on which of these four categories is best for you and your online course. From here, make a list of the three platforms or plugins that seem like the best fit for your specific needs.
To simplify this process, we’ve compiled various lists of online course platforms you can consult. Here are some of our best resources on course platforms:
- The 28 Best Online Course Platforms for 2024
- The 16 Best Online Course Hosting Options for 2024
- The Best WordPress LMS Plugins for Online Courses
- The 21+ Best Learning Management Systems
- How to Choose the Best Online Course Platform: 5 Steps to Find the Ideal Tool
Once you’ve chosen your platform, you’re ready to bring your course online!
This involves creating the course in your LMS or platform of choice and uploading the course videos, homework, quizzes, and other elements.
The good news is uploading your content is usually a simple process. Each online course platform or LMS has its own specific instructions on how to navigate the uploading process.
If you get stuck at any point at this stage, most online course platforms offer some degree of tech support. If you’re not particularly tech-savvy, you might want to consider choosing a platform that offers good customer support just in case you need some extra help.
Price Your Course
Before you can sell your course, you’ll need to figure out how to price it. The trick is to come up with a price that doesn’t undersell your course but also doesn’t turn early users away.
In addition, the way you price your course depends on a number of factors, including who your audience is, the problem you solve, and your level of expertise.
Here are a few steps you can take to help you determine what to charge for your course:
- What Your Competitors are Charging: Take some time to review the pricing of other popular courses in your niche. Seeing what your competitors are charging can give you a good sense of what the market rate is for a course like yours.
- The Value Your Course Provides: Consider the value or transformation you provide your students through your online course. Will your students increase their income, resolve their relationship problems, or achieve better physical or mental health as a result of taking your course? In general, the bigger the transformation, the more you can charge.
- The Amount of Personalized Attention: If your course provides students with personalized attention, such as group coaching, live Q&A sessions, or 1:1 support, you can justify charging far more than if your course just consists of videos and assignments for students to complete on their own, without extra feedback or support.
Here are a few more questions you can ask yourself to help you determine what pricing bracket your course needs to be in.
- What type of course do I want to build (premium or budget)?
- Who is my customer avatar, and how much available money do they have?
- What’s my level of experience?
- What are my revenue goals? What do I need to make per student?
Once you’ve completed these steps and answered these questions, you should have a much better idea of what you should charge for your course.
To see how your pricing stacks up, try this free course pricing calculator — it factors in your audience size, price point, and conversion rates to estimate your potential course revenue.

Sell Your Online Course
At last, you’re ready to launch your completed online course to the world!
But before you launch, it’s crucial that you understand exactly who you’re marketing to and have a polished sales page in place.
The first thing you want to do is review the customer profile you created all the way back in Step 1. Then you’ll need to use this information to create a sales page for your course. You already started this page during Step 2 while validating your idea. Now it’s time to update this page and create a high-converting, long-form piece of copy.
Once you have your sales page in place, you can then move onto launching your course. You can think about your launch as having two main phases: the Education and Selling phases.
The Education phase comes first and is when you focus on warming up your audience. You can accomplish this with a variety of methods, such as email marketing, content marketing, guides and tutorials, or online ads. No matter what methods you use, it’s crucial that you provide value to your audience while also educating them about the big problem they’re currently facing and what types of solutions are available.
You’ll also need to earn their trust, which you can do by sharing your personal story, providing credibility and proof, or highlighting work you’ve done in the past and the success you’ve had.
After you’ve warmed up your audience, you can then move into the Selling phase, where you invite them to take your course. This often centers around a webinar or email sequence that:
- Detail what the course is about and who it is for
- Provide social proof, testimonials, and case studies
- Explain the value of the course and the impact it has
- Paint a clear picture of what the transformation is for the student
- Offer bonuses for those who purchase the course at this stage
To learn more about how to successfully market and sell your online course, check out our guide on how to sell an online course.
Keep Marketing Your Online Course
No matter how good your launch period is, your launch isn’t where your journey ends. In fact, your journey has only just begun.
It’s crucial that all online course creators develop a strategy for marketing and promoting their online courses that they can rely on long after the launch period ends.
There are many marketing strategies you can implement for the long term, including:
- Content marketing
- Email marketing
- Webinars
- Marketing campaigns
- Joint venture partnerships
- Affiliate marketing
- Retargeting Ad Campaigns
- Cultivating online communities
- Running paid ads
- Influencer Marketing
- Reviews and referrals
To learn more about these and other marketing strategies, we recommend you review this post on how to promote your online course.
Gather Feedback
No matter how successful your online course is, the truth is no course is perfect and every course can be improved over time.
That’s why it’s crucial that you continue to track and measure your goals, gather student feedback, and note the most common student questions and issues. From here, zero in on the different areas that could use improvement and brainstorm ways you can address these challenges and create an even better student experience in later versions of your course.
We see too many course creators launch their courses and assume that’s it. However, you need to remember that online course creation is an iterative process.
In other words, if you want to create a course that has the greatest possible impact on your students, you need to try new ideas and to continue to improve your course over time.
There are many different ways to gather feedback from your students and to assess how well your course is performing. Here are a few methods we recommend:
1. Creating Student Surveys
You can easily create a survey using one of the many form builders available and send it to your students after they complete your course. When you are creating a student survey, you are looking for key data points that will inform how your online course can be improved.
Here are some key metrics to track in your surveys:
- What was the overall experience for your students?
- Identify what your students liked and disliked about the course.
- Do they have any suggestions for improvement?
- Will they be willing to recommend this course to others? Why or why not?
- What were some fears they had before buying the course?
- Did they achieve their goals after completing the course?
Student surveys can also help you check the pulse of your online course. If it is not bringing in the results they need, you can immediately diagnose the problem based on their feedback. On the flip side, student successes can lead to great testimonials that encourage others to enroll in your online course.
2. Measuring Your Results
It’s also a good idea to track various metrics related to how well your course is performing. A few important metrics to track include:
- Conversion Rates: How many of the people who visit your course page actually buy your course?
- Email Open Rates: Are people actually opening the course-related emails you send?
- Course Completion Rates: How many people who enroll actually complete your course?
You can also check how many people are watching your videos, downloading your content, or completing the assignments to assess overall engagement in your course.
3. Note Students’ Questions and Concerns
Finally, pay attention to any questions and concerns your students raise. If you find that many students are asking the same questions or running into the same issues, this is a sign that there is a problem with your course you must address. You’ll want to make sure that the student experience is as seamless as possible, so correcting any problem areas is a must.

Cultivate Your Online Learning Community
When it comes to online learning, it’s crucial that you give your students access to an online learning community they can engage with.
An online learning community offers many benefits to your students, such as connecting them with like-minded people who are working towards the same goal and giving them the opportunity to ask questions or receive feedback on a specific challenge they’re facing.
Having an online community for your course also gives you additional opportunities to connect with your students, assess their progress, and provide feedback and support when they need it.
So, how do you establish an online learning community? There are many different ways to accomplish this, including:
- Social Media Groups: Create a private social media group for people enrolled in your course.
- Slack Channels: Opening a private channel on Slack or another online communication platform.
- Members Area: Setting up a designated Members Area on your website.
As you can see, creating an online learning community doesn’t have to be an elaborate, drawn-out process. Simply setting up a private Facebook group or Slack channel for your students goes a long way in cultivating a sense of community and boosting student engagement.
Some course platforms, like Ruzuku, build community features directly into the course experience — with discussion threads at every lesson rather than requiring a separate group on Facebook or Slack. This keeps conversations connected to the content students are working through.
How AI Tools are Impacting Online Course Creation
On November 30th, 2022, Open AI opened its platform, Chat-GPT, to the public. In a matter of weeks, everyone online was abuzz with the possibilities of AI.
On one hand, many people were amazed at the ability to enter a simple prompt and generate complex images and entire blog articles in seconds. Others were afraid of the possibility of having their jobs replaced.
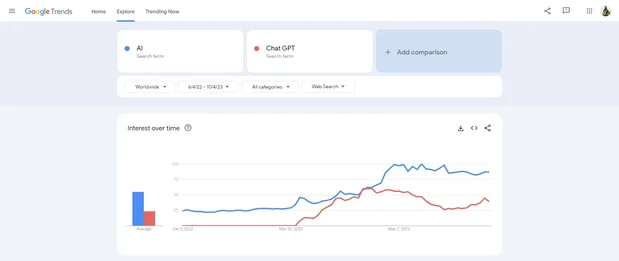
By April 2023, excitement for AI hit a peak. Chat-GPT 4 rolled out in March and hundreds of entrepreneurs were using OpenAI’s API key to create their own AI tools. Major corporations began incorporating AI into their platforms to increase functionality.
So, how does this all impact online courses? Well, there are some glaring positives and negatives to consider.
On the positive side, you have powerful tools available to you to minimize your time investment when you create your online courses. You can use AI tools for all stages of your business strategy, from general administration to AI copywriting tools for your marketing material.
The best way to incorporate AI tools into your online course business is to treat it like a competent intern. An intern can do most grunt work, but they don’t have the skill to perform higher-skilled tasks like strategic thinking for your business.
Likewise, you can use AI to give you ideas, suggest research topics, and even create rough drafts of your online course materials. However, you still need to revise your materials for accuracy, truthfulness, and to give it a human touch. Overall, AI tools can be a cost-effective way to create material for your business.
So with all these benefits, what negative effects will AI bring to online courses?
One of the first dangers of AI will be a flood of low-quality content. For example, Amazon Kindle is currently recovering from the tidal wave of AI-generated books that are in its marketplace. These AI-generated books crowd the bestseller list, overshadowing the hard work that other writers have put into the books they genuinely worked on.
As a result, there has been a hot legal discussion surrounding the validity of AI-generated work and whether it is protected by copyright. In August 2023, US courts declared that AI-generated work is not protected by copyright due to the lack of human authorship. Therefore, if you create an online course completely with AI, it is considered public domain.
Now, here is where the lines get blurry. There is no way to accurately quantify how much human input is needed to qualify for copyright. And verifying if you used AI is still very difficult. However, it is safe to say that copyright is going to always be in favor of human effort. Therefore, if you use AI to draft your work and you substantially improve it, your efforts are protected via copyright.
In the case of AI-generated text, another risk is the publication of false information. AI text generators are trained on Large-Language-Models (LLM). An LLM is a vast database that the AI tools use to generate content. However, if you have used tools like Chat GPT, you might have noticed that the generated text is not always 100% accurate. In fact, it is not uncommon for AI tools to fabricate information to satisfy your prompt. Also, AI tools are currently not able to count, search the internet, or verify if the information is factual.
A harrowing example of this occurred in June of 2023 when a lawyer used Chat GPT to search for relevant court cases to be used as evidence for an ongoing court case. Chat GPT fabricated the court cases and their citations, and the lawyer unintentionally brought false evidence to the case.
So, what does all of this mean for you as an online course creator?
In the grand scheme of online courses, you can expect low-quality online courses to saturate the market. Audiences will be starved of factual information that is actionable. As a result, they will not be easily persuaded by the amount of information you are offering but rather by the expertise of the seller.
If anyone can use AI to generate an online course and pose as an expert, then it is safe to assume that the market will be full of fake gurus who do not have much knowledge and expertise to share. Your target audience will be more hesitant to purchase, thus driving prices down. However, this does not mean you will be priced out.
As mentioned above, audiences will be starved for quality content, and that is where you come in. As an expert, you can provide audiences with a well-rounded understanding of your niche at a premium.
That’s right.
When the market is flooded with low-quality content and possible misinformation, your value as a subject matter expert increases. Regardless of whether you choose to use AI tools or not, your value will continue to grow as long as you deliver quality content that is factually accurate and beneficial to your audience.
AI will continue to the change the world in ways beyond our wildest imaginations. That is why it is so important to remain centered on your core values. As an online course creator, you are helping transform your students so they can achieve their goals. When you stick to your core values, you will be able to build your business as an online course creator sustainably.
How to Create An Online Course: Next Steps
We’ve covered a lot of ground, and hopefully you’ve decided if creating an online course is the right option for you.
If you’re bound and determined to move ahead and create an online course, it’s important to remember that this guide is a high-level overview designed to familiarize you with the process. While the process can seem daunting, if you break it down into smaller steps, you will be able to create an online course that enables you to teach your gift.
For a more in-depth look at the course creation process, you might want to consider enrolling in the Hybrid Courses Bootcamp. In this free Bootcamp, we break down many of the steps in this post and show you how to put them in action to develop a framework for your own winning online course.
By following this proven process, you’ll be well on your way to joining the ranks of the successful course creators who are impacting countless lives through their courses.