How to Create Teachable Courses in 2022: (Guide + Examples)
Loes Kotoun
Online learning is experiencing staggering growth right now, and millions of learners worldwide are surfing the internet daily to pick up the course that best suits their needs.
Creating your very own set of Teachable courses can be the springboard to a lucrative online venture for every (aspiring) course creator.
Wondering how to create your first Teachable course?
In this comprehensive guide, you will learn which basic steps to take in order to convert your valuable knowledge into an online course using the Teachable platform.
We’ll also show you some examples of what your Teachable course can look like.
Let’s dive right in!
What is Teachable?
Founded by Angkur Nagpul in 2013, Teachable is an online course platform where aspiring course creators can go all in, converting their knowledge and skills into online classes.
And not only that, since Teachable also allows for selling digital products like ebooks, templates, and audiobooks, and even lets you offer coaching and consulting services.
Whatever knowledge or skills you have, creating a Teachable course is a perfect way to monetize your gift.
And should your skill set include everything but being a techie, not to worry, as Teachable’s interface is user-friendly and doesn’t require any coding.
Teachable even takes web hosting and payment processing out of your hands. They “want to give you more time so that you can focus on what matters—creating an awesome online business.”
Let’s look at some of the key features:
- Option to link your existing website to Teachable under a custom domain
- Comprehensive dashboards to track sales and student insights
- No limit to the number of students
- Native integration with Calendly for easy booking and scheduling
Teachable offers four plans: Free, Basic, Pro, and Business.
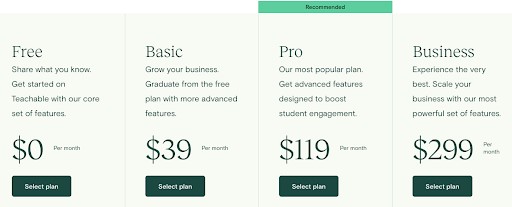
As of 2020, more than 37 million students have enrolled in courses created on Teachable. Course instructors using the platform collectively earned close to a staggering $1 billion.
Keep reading to learn how you, too, can jump on the online learning train and create your first course on Teachable!
How to Create Teachable Courses
Step 1: Establish Your School
Before you can get creative, you first need to sign up for a (free) Teachable account.
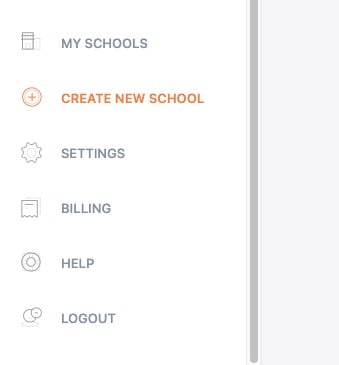
Then, after logging in, click Create New School via the menu on the left-hand side, after which you can name your school. No worries if you haven’t found the perfect name just yet—you can always change it later or skip this step for now.
Do make your school name gripping, relevant, easy to remember, and easy to pronounce.
Creating a school first is necessary to start building your Teachable courses.
What’s the difference between a school and a course?
To clarify, your Teachable school is like the general platform that hosts all your courses. You can compare it to a College, which is an institute that offers all sorts of classes.
Students enroll in your school, after which they can sign up for whatever course matches their needs.
After filling in a form to share a bit more about yourself, you will land in your admin area that hosts your dashboard.
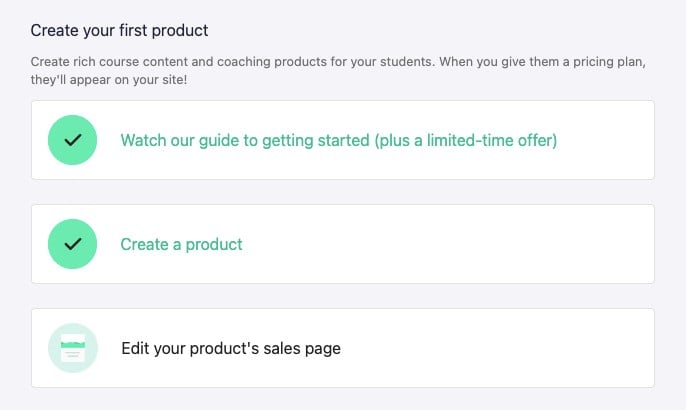
Your starting page also includes all the necessary steps to finish setting up your school. This means you’re guided, from start to finish, and every step completed gives you a green checkmark.
Step 2: Create Your Course
After watching the informative Quickstart Webinar, you are now ready to start creating!
First, you need to choose what product is about to sprout from your creative brain: Course or Coaching.
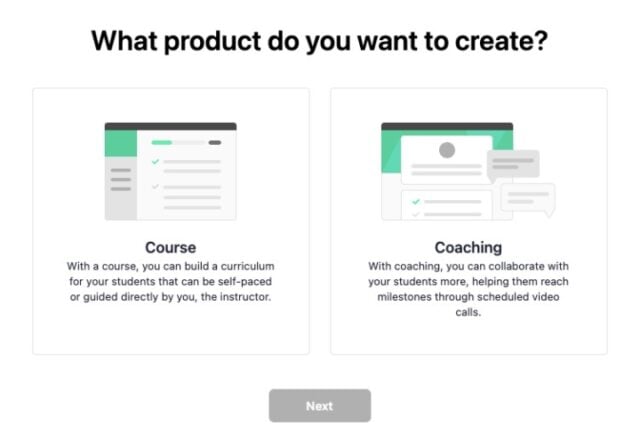
We’ll go for a course here.
The next screen will prompt you to pick a course title, subtitle (optional) and select the author. Then click Create Course, and off you go, ready to draft your first lecture!
Teachable made the lecture layout an easy-to-navigate editor in which you can add your text, videos, audio, files, and even create a multiple choice quiz.
Whether you have your files stored on your device, in Dropbox, Google Drive, or Microsoft OneDrive—the file uploader handles it all!
Step 3: Design Your Course Landing Pages
A well-designed landing page is generally proven to increase conversion and lead generation, which you then can nurture into buying customers. Contrary to a homepage, a landing page explicitly targets visitors who are ready to take immediate action, such as leaving their email address or signing up for a product.
Via your starting page, you can click the next step: ‘Edit your product’s sales page,’ in order to customize your Teachable landing page.
Some of the options include:
- Adding a banner
- Inserting an image with text
- Outlining your course curriculum
- Entering pricing information
- Adding an email leads form
After each step, you can preview your custom-designed landing page and edit until you are satisfied.

Step 4: Upload Course Media
Making a memorable impression on your potential consumers is key.
Superior branding sets the tone and provides your customers with a good sense of what you can offer them.
How to upload Course Media:
Login to your admin area → select the course → scroll down to the branding section and add your images.
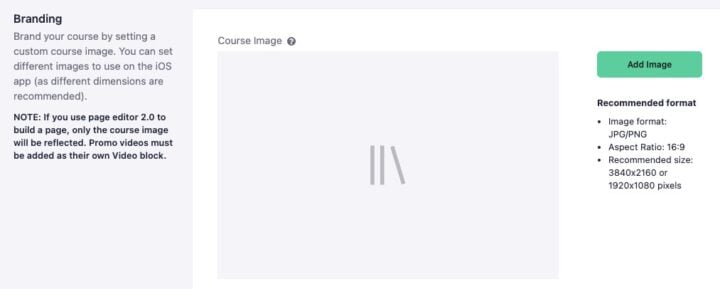
Then brand your course and start building a relationship with your audience!
Step 5: Set Up Sections and Lectures
You may already have various lessons on file you feel like uploading straight away. However, that’s not quite how it works.
Before you can add your content, you first need to create sections and lectures. This will help you better organize your course curriculum, making it easier to navigate for your students.
First, let’s look at the difference between sections and lectures.
A section focuses on a particular (broader) theme or subject, while a lecture breaks down that subject into smaller pieces, explaining it further.
You can generate both within the course curriculum.
Here’s how to create a section:
- Click Courses in your admin area
- Select the desired course
- Click Curriculum in the admin sidebar
- Click New Section in the upper right corner
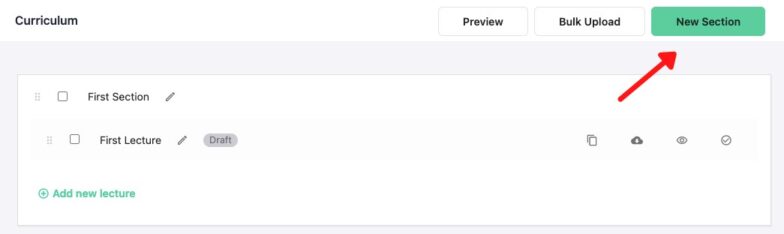
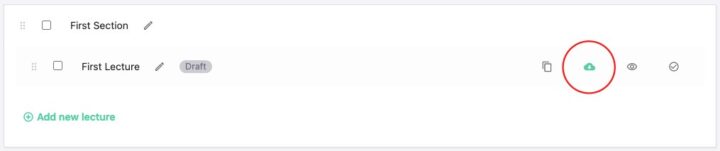
Creating a new lecture within the section can be done on the same page by clicking Add new lecture.
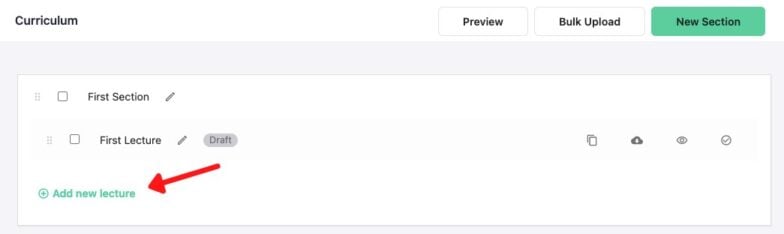
It’s always possible to rearrange lectures simply by dragging them into the desired order.
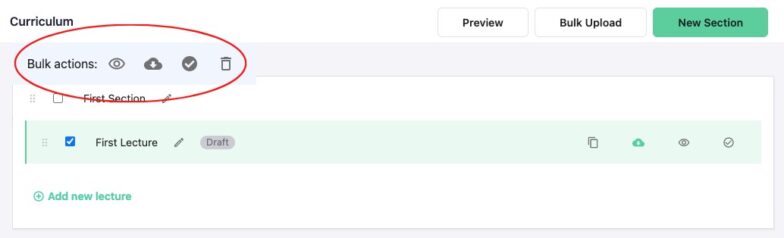
To delete any section or lecture, select the applicable checkbox to open a bulk actions bar. Click on the trash icon, and then confirm OK for deletion. Do note that you can’t undo this action.
Step 6: Add Your Course Content
Via the lecture editor in your admin area, you can add files, text, quizzes, and even (custom) code to your lectures.
In addition, you can directly embed video, images, PDFs, and audio files into your lectures.
Teachable supports all the common file types for embedding and downloading.
Any file type that Teachable does not support can still be uploaded, just not embedded. They will appear in the lecture as a downloadable file.
Follow these steps to add your content:
Login to your admin area → select the course → click Curriculum from the left-hand navigation bar, and select the applicable lecture.
Add File:
Use the file uploader to simply drag and drop your video, audio, PDF, or any other file. Alternatively, click on the ‘+’ to choose files from various sources.
Add Text:
The rich text editor will open, in which you can directly write course content. The text editor is a straightforward WYSIWYG editor, meaning however you type it, is how it will show on your page.
All well-known formatting tools are available in the editor (e.g., bold, italics, underline, bulleted list, hyperlink, etc.)
Add Quiz:
Quizzes are valuable in online learning. They add fun and help your students practice and test their existing knowledge. It also stimulates the learning process.
Teachable lets you add two types of quizzes: graded and non-graded. The quiz editor is entirely self-explanatory.
And if you want to make your lecture content downloadable, simply click the download toggle. It will make a download button visible under each file so students can save the file to their devices.
Step 7: Price Your Course
Teachable offers four pricing plans you can add to your product: Free, One-Time Purchase, Subscriptions, and Payment Plan.
You can choose whatever price you want for your course, as long as it’s a minimum of $0.99. Note that when using a different currency, make sure it converts to the minimum of $0.99.
Here’s how to access the pricing page:
Login to your admin area → select the course → click Pricing from the left-hand navigation bar → click Add Pricing Plan.
The below graphic will then pop up.
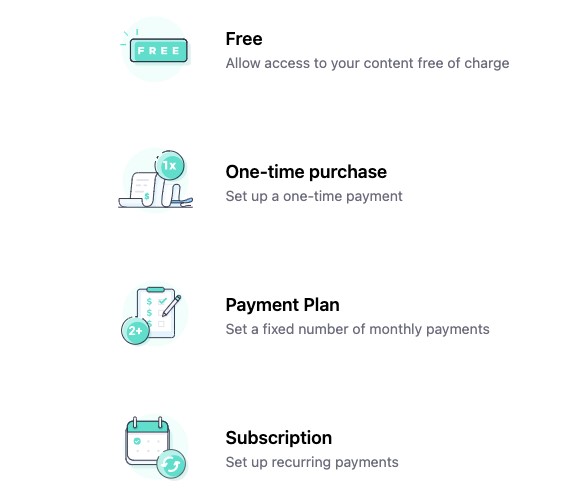
Choose your desired pricing plan and fill in the required fields.
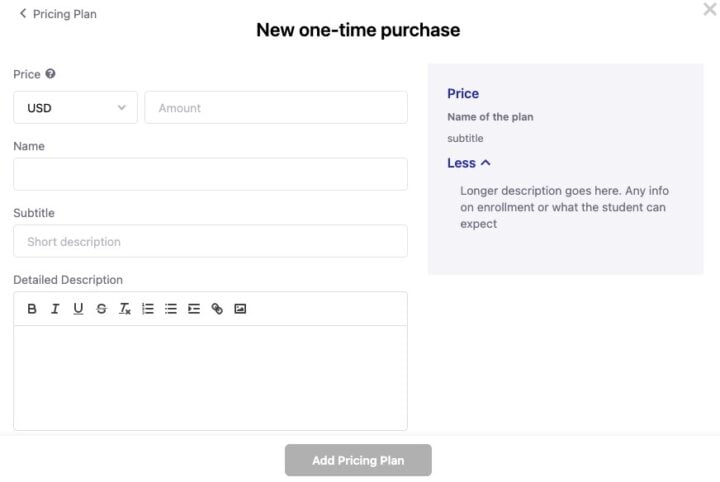
Note that without a pricing plan, your course will show as being closed for enrollment.
Once finished, click the Add Pricing Plan button to activate the plan.
3 Amazing Teachable Courses and Sites
As promised, we’ll now show you what your Teachable course can look like. Below you will find three real-life examples of highly successful Teachable courses.
I Can Make Shoes
Amanda Overs masters not only the art of making shoes but also the art of creating a Teachable course that tickles your senses.
I Can Make Shoes is an eye-catcher from the moment it opens. Landing page, branding, fonts, use of colors—it’s clear and a pleasure to scroll through.
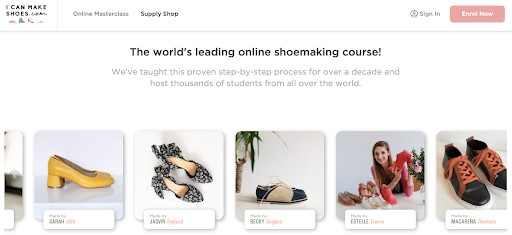
Can you spot the power words? World’s leading, proven, step-by-step, thousands. Words that trigger the human mind.
She also covers the magical ‘why,’ which is extremely powerful in the land of selling services.

Overall an inspirational course page beautifully showing the available Teachable building options.
IO Music Academy
IO Music has a landing page that piques interest. It has only a little information, which may create curiosity.
Learn from your favorite artists. ‘Okay, what artists do they refer to?’ ‘And what exactly can I learn?’. Most will now click through to have their questions answered.

They also effectively use the top bar to show their various course options. And a blog and FAQ are included, which may generate credibility.
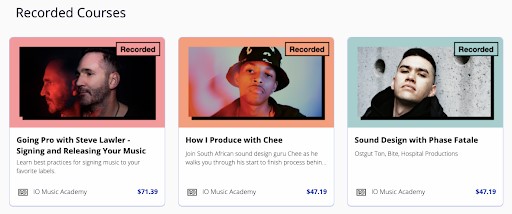
The Recorded Courses sales page is simple yet effective, showing only the most vital information, plus the applicable course price.
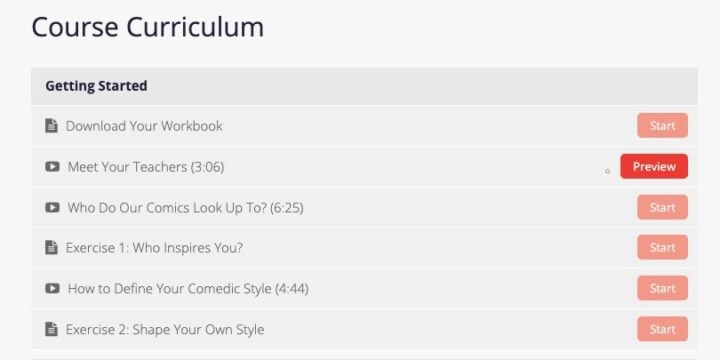
Stand Up NY
Stand Up NY opens its landing page with a trigger—followed by a powerful tagline.
Look at how they’ve added the option to watch a promo video, another cool Teachable feature.

Scrolling down further, you will see a course curriculum in which they added the smart feature of previewing one of the course elements.
Hopefully, these three examples gave you some insight into the extensive options possible for your online course using the Teachable platform.
Share What You Know!
Selling knowledge is rising, and the e-learning industry is expected to grow to an impressive $300 billion by 2025.
Creating an online course is the way to go when you are ready to monetize your knowledge and expertise on a subject.
Teachable courses are a great starting point for your online course venture, and this post showed you how to get the ball rolling.
Ready to get started? Then go set up your Teachable account and begin building your content!
Want to learn more about the online course creation process? We invite you to enroll in our Free Hybrid Courses Bootcamp so you can set yourself up for long-term success.
Let’s Start Building Your Online Course!
In our FREE Hybrid Courses Bootcamp, we’ll walk you through how to transform your knowledge and expertise into a profitable online course… one your students will love.
about author
Loes Kotoun
Loes Kotoun is an elated Smart Blogger Certified Content Marketing writer on a mission to make her writing the answer to your content prayers. She sprinkles fairy dust over SEO-friendly words so your business can set foot in the spotlight. Connect with her on LinkedIn or visit her writer profile.
Read more posts by Loes Kotoun